
Airplane Galley Set Dressing: A Props Checklist for Set Decorators
October 13, 2026
Airplane Emergency Scene Props: A Checklist
October 14, 2026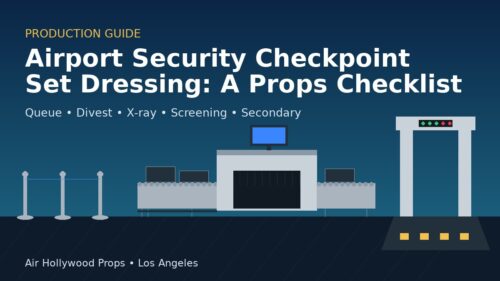
Airport security is one of the most recognizable places on screen. Audiences have stood in that line, taken off their shoes and watched their laptop disappear into an X-ray tunnel, so they notice instantly when a checkpoint looks wrong. A bin in the wrong spot, a metal detector with nothing around it or a queue with no stanchions is enough to break the scene.
Filming at a working checkpoint is rarely practical, so most productions build their own on a stage, in a location or on a standing airport set. This airport security checkpoint set dressing checklist walks production designers, set decorators, prop masters and producers through the props you need, in the order passengers move through them, plus the details that make the difference on camera.
Plan the Checkpoint Around the Passenger Flow
A real checkpoint is a one-way path. Before you pull props, sketch the flow from left to right (or front to back) for the camera: queue, document check, divest tables, X-ray, walk-through screening, recompose area and, if the story needs it, a secondary screening zone. Every prop on this list belongs to one of those stations. Building in that order keeps your layout logical and makes it easy for background actors to know where to go between takes.
Two questions shape the rest of the list:
- How much will the camera see? A single-lane close-up needs fewer pieces than a wide shot of three lanes, but each piece has to hold up in detail.
- What era is it? A present-day checkpoint has body scanners, digital ID readers and touchscreen monitor stations. An older look relies on walk-through metal detectors, handheld wands and simpler podiums.
Station 1: The Queue
The queue tells the audience where they are before anyone speaks. It is also where you control the movement of extras.
- Belt stanchions. Plan for more than you think: switchback lines eat posts quickly. Our stanchions come in chrome or black posts with red, blue or black belts.
- Stanchion sign frames. Small framed signs on the posts carry the rules: liquids, laptops, shoes. Print your own cleared graphics.
- Lane identifiers. A tall sign such as a PreCheck sign pole separates lanes and reads clearly in a wide.
- Authority markers. A Homeland Security seal sign on the back wall establishes jurisdiction in one frame.
Station 2: Document Check
This is where many dialogue scenes happen, so treat it as a hero area.
- Podium. A TSA security gate podium gives the officer a place to stand and the camera a strong foreground.
- ID technology. Add an ID scanner, a passport scanner or a blacklight hologram reader for document inspection inserts.
- Small dressing. Pens, a boarding pass scanner and a desk phone keep the podium from looking staged.
Station 3: Divest Tables and Bins
The divest area is where passengers unload their belongings, and it is the part of the checkpoint that most often looks too empty on screen.
- Tables. Six-foot stainless steel tables work as divest and bag-check surfaces.
- Bins, lots of them. Stack security bins at the start of the line and scatter more along the rollers. Mixing sizes and colors makes the line look used.
- Bin carts. A rolling security bin cart at the far end shows bins being returned to the front, a detail people recognize without realizing it.
- Passenger props. Fill bins with shoes, jackets, laptops, belts and clear bags of toiletries. This is the cheapest way to add life.
Station 4: X-Ray Lane
The X-ray machine is the centerpiece, so position it first and build the rest of the lane around it.
- X-ray machine. We rent working units in several sizes, including a 53 x 80 inch X-ray machine and a 47 inch model, which let bags actually move through on camera.
- Roller conveyor tables. Place roller conveyor tables on both the feed and exit sides so the lane reads at full length.
- Operator station. A TSA security monitor station and a security chair give the screener somewhere to sit and a screen for reaction shots.
Screen content tip
If you see the X-ray operator’s monitor, prepare playback graphics in advance and keep them fictional. Plan the content with your graphics and playback teams so the image matches the bag in the scene.
Station 5: Walk-Through Screening
- Walk-through metal detectors. Choose gray, beige or black trim to match the era and color palette of your airport.
- Body scanner. For a modern look, a body scanner mock-up with lights instantly says present day.
- Runner mats. Black security runner mats with yellow striping finish the floor and guide extras through the arch.
Station 6: Recompose and Secondary Screening
The area after screening is where the drama usually happens: the bag pulled for a search, the passenger patted down, the argument over a confiscated item.
- Recompose benches or tables where passengers put shoes back on.
- Handheld wands. A handheld metal detector or loop-style wand for secondary screening.
- Divider panels. Security divider panels hide set walls, separate lanes and create a semi-private search area.
- A dedicated station. A DHS-TSA security station adds an extra layer of officialdom for interrogation or escalation beats.
Details That Sell the Scene
- Wear and repetition. Real checkpoints repeat the same equipment across lanes. Matching multiples, such as identical tables, rollers and stanchions, look more authentic than a mix of one-offs.
- Wayfinding. Add overhead and freestanding airport signage so the checkpoint connects to the rest of the terminal.
- Uniforms. Dress officers consistently. Our wardrobe and accessories category covers crew and ground staff looks.
- Clearances. Keep logos and agency graphics accurate where the story needs them, and run all printed signs past your clearance team.
Rent Props or Use a Standing Set?
If the checkpoint is one scene among many airport locations, renting checkpoint props and building inside your own space is often the most flexible option. If the story moves from curbside to gate to cabin in one day, consider filming on the Air Hollywood airport terminal set and adding props from our TSA checkpoint props collection to extend it. For the cabin side of the story, see our airplane galley set dressing checklist.
FAQ
What props do I need for a basic airport security checkpoint scene?
At minimum: stanchions for the queue, a podium for the document check, divest tables, a stack of security bins, an X-ray machine with roller tables on both sides, a walk-through metal detector and a runner mat. Add a monitor station and a handheld wand if the scene includes screening or a search.
Do the X-ray machines actually work?
Several of our X-ray machines are listed as working, so bags can travel through on the belts during a take. Check the individual product page for each unit’s size and status, and ask us about anything specific to your scene.
How many security bins should I rent?
It depends on the number of lanes and how wide the shot is. A busy single lane can easily use a full stack at the entry, several in motion on the rollers and more on the bin cart. Tell us your lane count and shot list and we can help you estimate.
Can I build a period airport security checkpoint?
Yes. Leave out body scanners and modern digital screens, and lean on walk-through metal detectors, handheld wands, simple podiums and printed signage that suits your year.
Request a Quote
Ready to build your checkpoint? Browse our airport security props, add the items you need to your props bin and submit a quote request. No account is required, and we aim to reply within 24 hours. Questions about sizes, quantities or availability? Contact Air Hollywood Props and our team will help you plan the lane.
Have more questions about renting? Read our aviation prop rental FAQ.
Building the whole passenger journey? Start upstream with our airport check-in counter set dressing guide.